Temperature Reading with Raspberry + DS18B20
- Paulo Cesar de Souza
- Internet of things
- January 27, 2025
Table of Contents
Step by step guide to use the DS18B20 sensor with Raspberry Pi
Required Materials
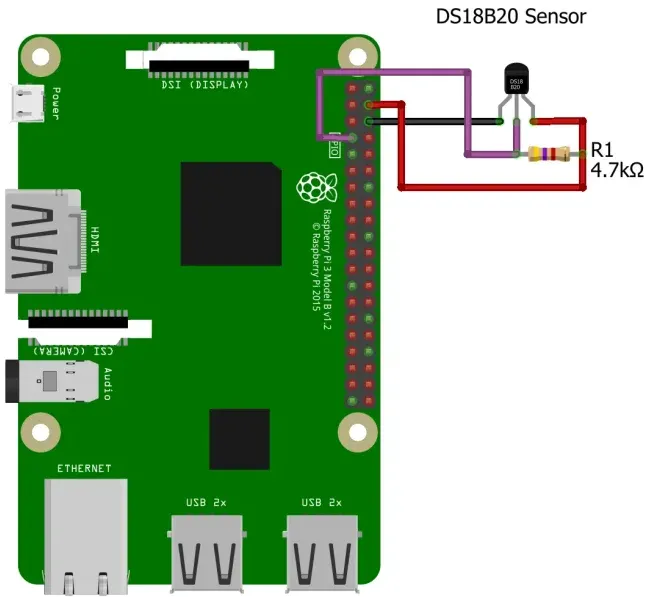
- Raspberry Pi
- DS18B20 temperature sensor
- 4.7KΩ resistor
- Breadboard (optional)
Understanding the DS18B20 Sensor
The DS18B20 is a digital temperature sensor known for its precision and ease of use. Its one-wire interface simplifies the connection process, making it a favorite among hobbyists and professionals. With its ability to operate over a wide temperature range, it is suitable for various applications, from home automation to industrial monitoring.
Setting Up Raspberry Pi
Before diving into the sensor connection, make sure your Raspberry Pi is set up and running. You can install the Raspbian operating system, connect to the internet, and enable the SSH interface for remote access. Also, make sure your Raspberry Pi has the necessary GPIO pins available to connect the DS18B20 sensor.
Requirements
On the Linux system where your Node-RED is running and where your sensors are connected, make sure you have loaded all the necessary kernel modules to work with 1-Wire devices, which is the DS1820 sensor. So you need to enable or have enabled the 1-Wire Interface on the Rpi. To do this, simply access the Raspi-Config page with:
sudo raspi-config
Go to Interfaces and then to 1-Wire, enable it and reboot the device. You’re done.
Required Node-RED Plugins
- node-red-dashboard
- node-red-contrib-ds18b20-sensor
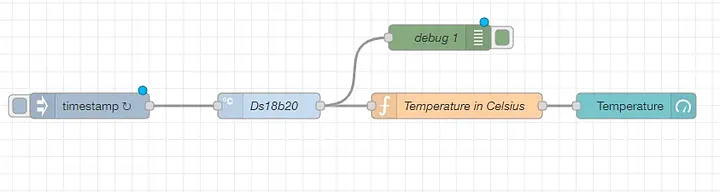
Build the Flow Below
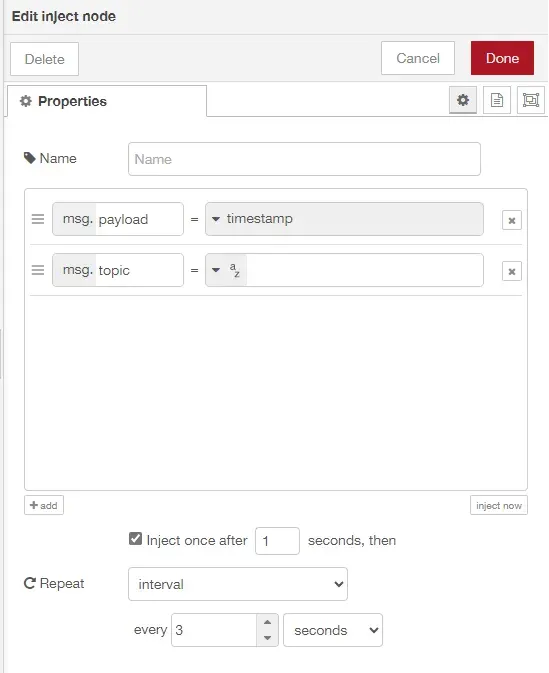
- Drag and drop an Inject node
- Function node

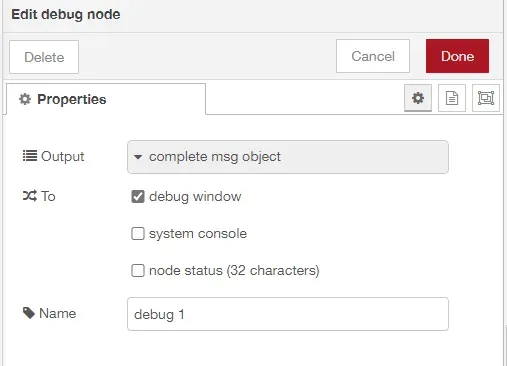
- Debug node
- Double-click the rpi-DS18B20 node to configure it

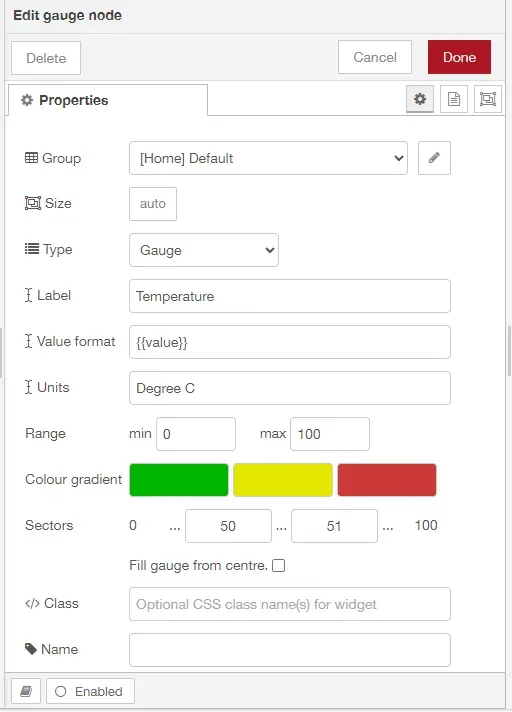
- Gauge node